How To Replace An Intake Manifold Gasket
Vehicles are complecated mechines made up of several sophisticated parts

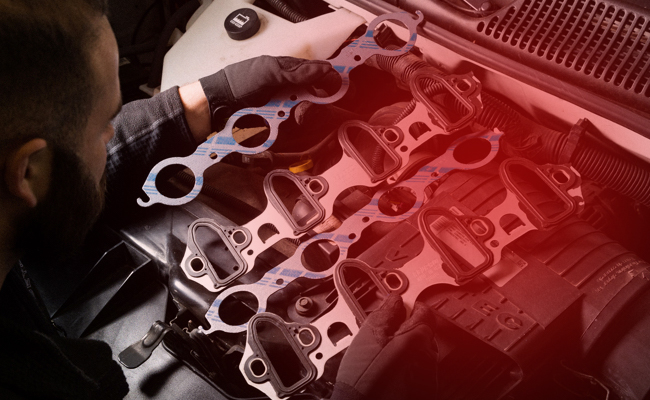
The intake manifold gasket is just like any other rubber gasket found in the car. It is a line of rubber that sits between two components and prevents any kinds of leaks and reduces vibrations. In this case, the gasket sits between the intake manifold and the top half of the engine. An internal combustion engine is a complex piece of machinery that has many parts that work in tangent to move and stop the car as per the user’s instructions. The intake manifold gasket is one hidden component of the engine that also plays a significant role in keeping the engine in a running state.
What happens when the gasket breaks?
A damaged gasket could lead to an increase in vibrations and leaks. It could either create a vacuum or leak the coolant out into the open. The amount of coolant spurting out can increase with the increase in engine speed and pressure build-up. This is not ideal for your car because it can cause overheating which in turn can limit the full performance of your vehicle and also lead to more damage. If you notice any leaks around the intake manifold or experience misfiring, it could point to a bad gasket.
Something to consider
Admittedly, the job of intake gasket replacement gasket can take up a considerable amount of time and does require some patience. This can be a rather complex job depending on the way things are laid out in your engine bay. But it can be done by an individual at home and with some basic tools. So, should you want to save some money or want to get a better understanding of the components inside your vehicle, this is a job that you can do yourself. Make sure that you have enough time on your hands and will not need the car during the day.
What you will need
- New intake manifold gasket
- Screwdriver
- Brake cleaner
- Clean cloth
- Socket and ratchet
- Rubber gloves
- Safety goggles
Preparing the car
- Start off by parking your car and switching it off. Make sure that the handbrake is engaged. You can also chock the wheel for additional safety. This ensures that the car does not roll during the manifold gasket replacement.
- Open the hood of your car and disconnect the negative terminal of the battery as you will be dealing with electrical cables.
- Find the cap on top of the front radiator and open it.
- Next, locate the drain plug on the lower side of the radiator and open it to drain the coolant. Collect the coolant in a collection pan or bucket.
- With the coolant drained, close off the drain plug and screw the cap back on top as well.
Manifold design
Getting to the manifold can vary from car to car. So, you will have to take a slightly different route depending on your model. In some cars, the components that obstruct access to the exhaust manifold are minimal while in others you might have to remove a lot of things. As such, it is a good idea to take a few pictures of the engine bay before you begin disconnecting and removing anything. Take pictures from different angles so that you can cover almost every side of the area. Also, you can choose to label the cables and hoses around the engine for easier identification when putting everything back together.
Getting to the intake manifold
- Disconnect the various hoses and cables connected to the top of the engine.
- Remove the air intake hose along with the throttle body.
- You might have to remove the serpentine belt as well. Use a square bolt and a breaker bar to release the tension from the belt so that it comes off easily.
- In some cases, you might have to remove the fuel rail as well. Remove the injector cables first and then extract the rail by removing the bolts holding the rails down.
- Remove any other component that might be obstructing your access to the intake manifold.
Replacing the old gasket
- The intake manifold should have 8-9 bolts on top of it. Use a socket of the appropriate size and undo them one by one.
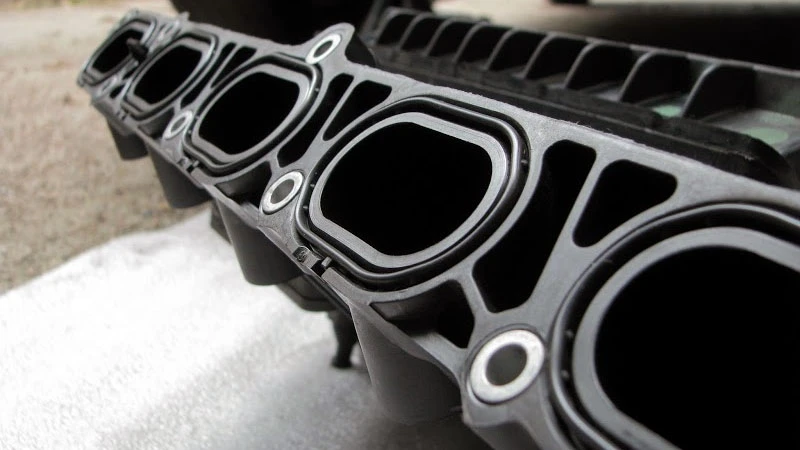
- With the bolts off, you should be able to take the top part of the manifold out. In case your car has a single-piece manifold, you should be able to see the gasket now.
- But if your vehicle has a multi-piece manifold, you will have to remove an additional set of screws to set the lower half free. With the bolts gone, you should be able to pull them out by hand.
- With the manifold off, the intake ports are left exposed and dust and debris can fall into them. Place a clean rag or pieces of foil paper to shield the ports.
- There is a high chance that the old gasket might have melted and become stuck to the manifold. You can use a razor or a similar sharp object to scrape it off.
- Use brake cleaner spray to clean off the surfaces and provide a fresh contact patch for the new gasket.
Replacing intake manifold gasket
- Now it is time to install the new gasket. Just make sure that all the pieces line up properly in the space where the old gasket was.
- Certain cars require a sealant or screws to secure the gasket.
- Place the manifold on top of the gasket and make sure that you do not wriggle it around too much or else the gasket will not fit properly.
- Put the bolts back on top of the manifold and tighten them. Check your owner’s manual for instructions on the order and magnitude to which you have to tighten the bolts. Some cars can have plastic material and it is important that you do not overtighten the bolts.
- If your car’s manifold has a top part, secure it like the lower half in the previous step.
Finishing the job
- Now it is a case of putting everything else back together. This includes all the components that you removed previously like the throttle body, fuel rail, serpentine belt and electrical cables.
- Open the top cap on the radiator once again and fill it with coolant of the right spec.
- Reconnect the negative terminal of the battery so that you can switch on your car.
- Start your car and let it idle for a while. Inspect the engine area for any leaks or odd sounds. If all is well, you can safely close the hood and drive your car around.
 GaragePro
Proin eu nisl et arcu iaculis placerat sollicitudin ut est
Maecenas accumsan tortor ut velit pharetra mollis. Proin eu nisl et arcu iaculis placerat sollicitudin ut est. In fringilla dui dui.
Stay Connected
Tags
Newsletter
The most important world news and events of the day.
Get magzrenvi daily newsletter on your inbox.





.jpg)
